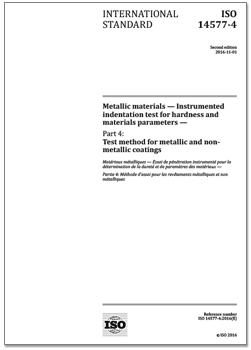
INTERNATIONAL STANDARD ISO 14577-4
Metallic materials — Instrumented indentation test
for hardness and materials parameters —
Part 4:
Test method for metallic and non-metallic coatings
ISO 14577 consists of the following parts, under the general title
Metallic materials —— Instrumented indentation test
for hardness and materials parameters
ISO 14577-1:2015, Metallic materials — Instrumented indentation test
for hardness and materials parameters — Part 1: Test method
ISO 14577-2:2015, Metallic materials — Instrumented indentation test
for hardness and materials parameters — Part 2: Verification and calibration of testing machines
ISO 14577-3:2015, Metallic materials — Instrumented indentation test for hardness and materials parameters — Part 3: Calibration of reference blocks
ISO 14577-4:2016, Metallic materials — Instrumented indentation test for hardness and materials parameters — Part 4:Test method for metallic and non-metallic coatings
Contents
Foreword
Introduction
1 Scope
2 Normative references
3 Symbol and designations
4 Calibration and direct verification of testing machines
5 Test pieces
6 Procedure
7 Data analysis and evaluation of results for indentation normal to the surface
8 Uncertainty of the results
9 Test report
Annex A (informative) Contact point and fully elastic regime
Bibliography
1 Scope
This part of ISO 14577 specifies a method for testing coatings which is particularly suitable for testing
in the nano/micro range applicable to thin coatings. However, the application of this method of this par of ISO 14577 is not needed if the indentation depth is such a small fraction of the coating thickness that
in any possible case a substrate influence can be neglected and the coating can be considered as a bulk
material. Limits for such cases are given.
This test method is limited to the examination of single layers when the indentation is carried out
normal to the test piece surface, but graded and multilayer coatings can also be measured in cross-
section if the thickness of the individual layers or gradations is greater than the spatial resolution of the
indentation process.
The test method is not limited to any particular type of material. Metallic and non-metallic coatings are
included in the scope of this part of ISO 14577. In this part of ISO 14577, the term coating is used to refer
to any solid layer with homogeneous properties different to that of a substrate it is connected to. Th method assumes that coating properties are constant with indentation depth. Composite coatings are
considered to be homogenous if the structure size is less than the indentation size.
The application of this part of ISO 14577 regarding measurement of indentation hardness is only
possible if the indenter is a pyramid or a cone with a radius of tip curvature small enough for plastic
deformation to occur within the coating. The hardness of visco-elastic materials or materials exhibiting
significant creep will be strongly affected by the time taken to perform the test.
NOTE 1 ISO 14577-1, ISO 14577-2 and ISO 14577-3 define usage of instrumented indentation testing of bulk
materials over all force and displacement ranges.
NOTE 2 The analysis used here does not make any allowances for pile-up or sink-in of indents. Use of Atomic
Force Microscopy (AFM) to assess the indent shape allows the determinion of possible pile-up or sink-in of the
surface around the indent. These surface effects result in an under-estimate (pile-up) or over-estimate (sink-in) of
the contact area in the analysis and hence may influence the measured results. Pile-up generally occurs for fully
work-hardened materials. Pile-up of soft, ductile materials is more likely for thinner coatings due to the constraint
of the stresses in the zone of plastic deformation in the coating. It has been reported that the piled up material
results in an effective increase of the contact area for the determination of hardness, whithe effect is less
pronounced for the determination of indentation modulus, since the piled up material behaves less rigidly.
2 Normative references
The following documents, in whole or in part, are normatively referenced in this document and are
indispensable for its application. For dated references, only the edition cited applies. For undated
references, the latest edition of the referenced document (including any amendments) applies.
ISO 14577-1:2015, Metallic materials — Instrumented indentation test for hardness and materials
parameters — Part 1: Test method
ISO 14577-2:2015, Metallic materials — Instrumented indentation test for hardness and materials
parameters — Part 2: Verification and calibration of testing machines
INTERNATIONAL STANDARD ISO 14577-4:2016(E)
? ISO 2016 – All rights reserved 1
ISO 14577-4:2016(E)
ISO/IEC Guide 98-3, Uncertainty of measurement — Part 3: Guide to the expression of uncertainty in
measurement (GUM)
在線閱讀 免費下載


